Posted on

A DIY reflow oven

A Raspberry Pi with an Adafruit MAX31855 thermocouple interface board and a solid-state relay is used to control the temperature profile in an oven for reflow surface-mount soldering. The software running on the Raspberry Pi is here: https://github.com/apollo-ng/picoReflow. The instructions in the README.md file in the picoReflow project are good, with one modification needed: to auto-start on power-up, the reflow script in lib/init needs “#! /bin/sh” on the first line of the file, not line 12 as given.

I set my Raspberry Pi with a static IP address of 192.168.0.222, so the address to browse to see the oven interface is 192.168.0.222:8081.

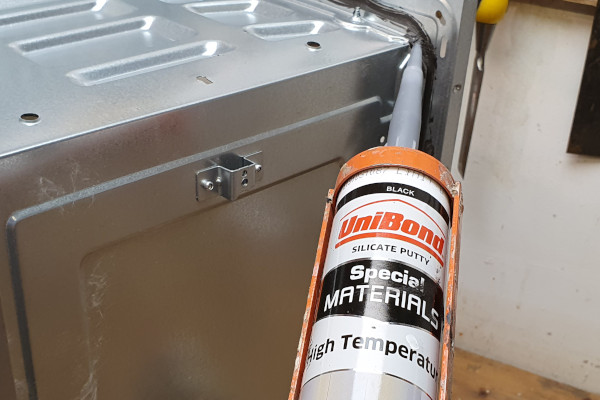
The oven used is an Argos Cookworks 20L 1380W model with top and bottom heaters. The heaters are connected in parallel. Extra insulation is added around the top and sides of the oven chassis and in the door. The seams are sealed with high-temperature putty. Some cross-bars in the rack are removed to reduce thermal mass.

The unmodified oven
Dismantled
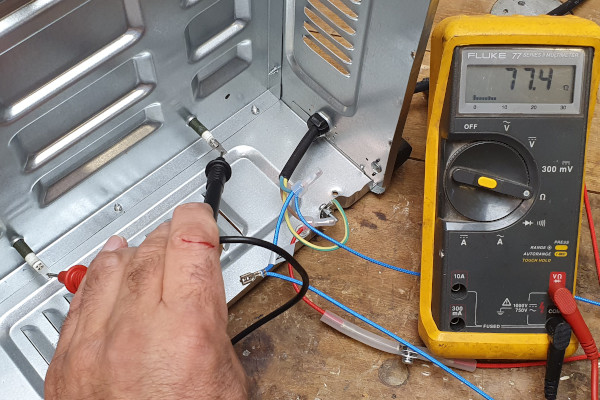
Resistance of bottom elements
Door insulation
Complete: gold reflective tape covers seams and glass surface of door
Rear label
Resistance of top elements (two in series)
Sealing the joints
Internal wiring

Posted on

An audio frequency response tester

Using the Digilent Analog Discovery 2 to automatically test audio frequency response

An Analog Discovery 2 (AD2) signal generator is configured to generate a sine wave through a range of frequencies. The sine wave is fed into the Unit Under Test (UUT) and an AD2 oscilloscope channel is used to sample the UUT’s output. A Python script automates the whole thing and produces a .csv file and graphical plot of the results. Python script details are here.

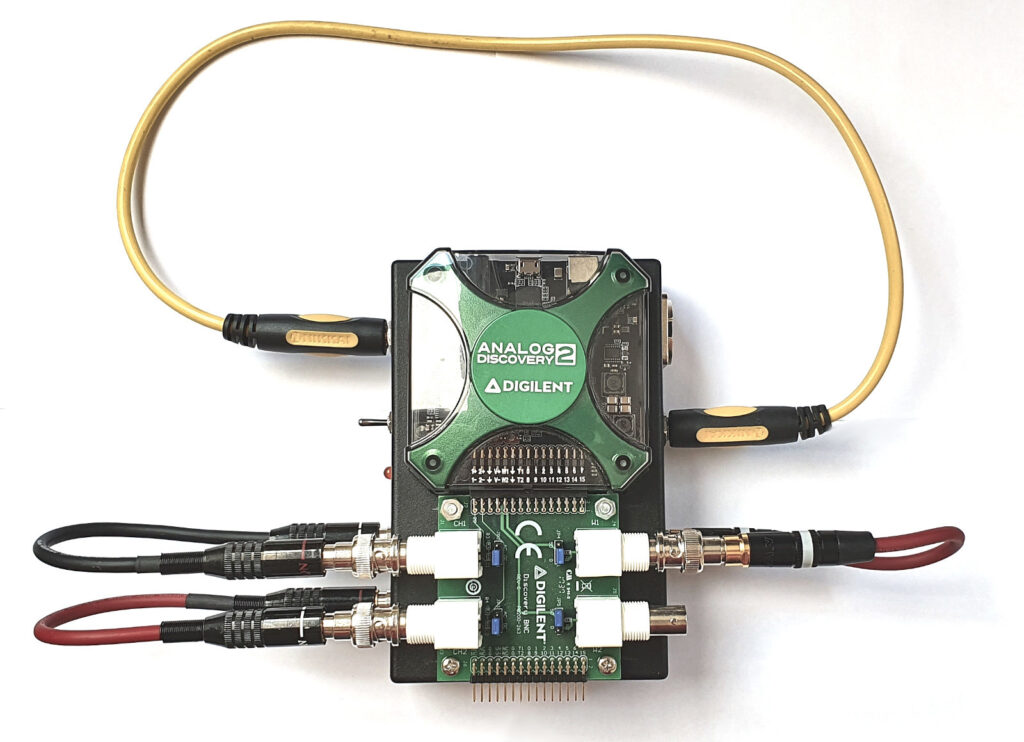
The AD2 mounts conveniently on a standard die cast aluminium enclosure (e.g. Hammond 10758). The enclosure houses connectors to route the signals and a switch and LED to select jack or XLR inputs.

Analog Discovery mounted on Hammond 10758 enclosure, output connected to input

Scope channel 1 connects to either a 6.35mm jack or the positive pin of a balanced XLR, selected with the switch. Channel 2 connects to the negative pin of the XLR.

Adapter wiring diagram

The signal generator is fed to the UUT and directly back into channel 2 of the oscilloscope so the phase delay between channel 1 and channel 2 can be calculated, for the phase response measurements.

Adapter schematic
Adapter schematic

The first thing to do is connect the signal generator output directly back into the ‘scope input, as shown in the photo above, in order to check the frequency response of the tester. The test script produces the following plot:

Frequency response of test equipment

The plot is reassuringly flat from 10Hz to 200kHz, with a negligible but consistent gain offset of around 0.2dB throughout.

Posted on

Installing Scilab on Ubuntu 20.04 LTS

The default install of Scilab doesn’t work on Ubuntu 20.04. I downloaded Scilab 6.1.0 from the Scilcab website. When executing the scilab executable, the following error occurs:

error while loading shared libraries: libtinfo.so.5: cannot open shared object file: No such file or directory

Turns out I have libtinfo.so.6 installed, so the fix is:

sudo ln -s /usr/lib/x86_64-linux-gnu/libtinfo.so.6 /usr/lib/x86_64-linux-gnu/libtinfo.so.5

Posted on

Scripting the Analog Discovery 2 with Python in Linux Part 2

Now that Python and the Digilent DWF Python wrapper are installed (link), we can start using the Analog Discovery 2 to do something useful. The Waveforms SDK provides access to an API that allows the creation of custom applications using the Digilent Analog Design hardware (e.g. the Analog Discovery 2). The reference manual is here.

Working code examples are installed in /usr/share/digilent/waveforms/samples/

I used AnalogIn_Record_Wave_Mono.py as a basis, and along with it copied dwfconstants.py to the project folder.

For a multi-threaded front-end, I used the good example here: https://github.com/beenje/tkinter-logging-text-widget/blob/master/main.py

The script generates a sine wave at a range of frequencies on signal generator channel 1 and samples the input on scope channel 1. Gain is calculated for each frequency, with the aim of evaluating the frequency response of some audio hardware. Some flakiness with the USB connection was solved by switching the PC connection to the Analog Discovery 2 from a USB 2 to a USB 3 port. Code is available here: https://github.com/richardtoller/1007-AD2.git. I used the PyCharm IDE.

The first test to run is with the Analog Discovery 2 output connected directly back to its input, i.e. with no test hardware in the circuit, to establish the frequency response of the test kit.

Posted on

Scripting the Analog Discovery 2 with Python in Linux Part 1

First, install Python, etc

First, check we have python installed:

python3 --version

The result is “Python 3.8.2” on my system. Now check we have setuptools and pip installed. These are third-party Python packages that we (may) need later.

command -v pip

The result is nothing, so we need to install as follows:

curl https://bootstrap.pypa.io/get-pip.py -o get-pip.py
python3 get-pip.py

This installs to /home/USER/.local/bin which is not on PATH. To add to the path:

export PATH="$HOME/.local/bin:$PATH"

Now install the Python dependency manager pipenv (this does a user installation to avoid breaking any system-wide packages):

pip install --user pipenv

Next, install the Adept 2 runtime and Waveforms software to allow communication with the hardware

Install Adept 2 from the Digilent site here. Install Waveforms here.

Next, install the Digilent DWF library wrapper for Python

pip install dwf

This installs the latest stable version of DWF.

Try it

Here’s a test script, modified from a version found on the Digilent forum (forum.digilent.com):

from ctypes import *
import sys

if sys.platform.startswith("win"):
    dwf = cdll.dwf
elif sys.platform.startswith("darwin"):
    dwf = cdll.LoadLibrary("libdwf.dylib")
else:
    dwf = cdll.LoadLibrary("libdwf.so")

#declare ctype variables
szerr = create_string_buffer(512)
dwf.FDwfGetLastErrorMsg(szerr)
print (szerr.value)

#declare ctype variables
IsInUse = c_bool()
hdwf = c_int()
channel = c_int()
hzfreq = c_double()
cdevices = c_int()

#declare string variables
devicename = create_string_buffer(64)
serialnum = create_string_buffer(16)

#print DWF version
version = create_string_buffer(16)
dwf.FDwfGetVersion(version)
print ("DWF Version: "+str(version.value))

#enumerate and print device information
dwf.FDwfEnum(c_int(0), byref(cdevices))
print ("Number of Devices: "+str(cdevices.value))

for i in range(0, cdevices.value):
    dwf.FDwfEnumDeviceName (c_int(i), devicename)
    dwf.FDwfEnumSN (c_int(i), serialnum)
    print ("------------------------------")
    print ("Device "+str(i)+" : ")
    print ("t" + str(devicename.value))
    print ("t" + str(serialnum.value))
    dwf.FDwfEnumDeviceIsOpened(c_int(i), byref(IsInUse))

    if not IsInUse:
        dwf.FDwfDeviceOpen(c_int(i), byref(hdwf))
        dwf.FDwfAnalogInChannelCount(hdwf, byref(channel))
        dwf.FDwfAnalogInFrequencyInfo(hdwf, None, byref(hzfreq))
        print ("tAnalog input channels: "+str(channel.value))
        print ("tMax freq: "+str(hzfreq.value))
        dwf.FDwfDeviceClose(hdwf)
        hdwf = c_int(-1)

# ensure all devices are closed
dwf.FDwfDeviceCloseAll()

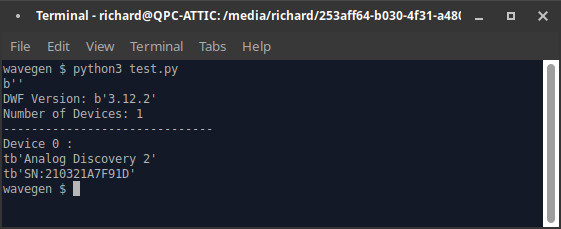
Running the script results in the following output:

Posted on

Running multiple WordPress sites on Ubuntu Studio 20.04 LTS

Step 1: install Apache2

sudo apt install apache2

start Apache and have it run on system boot:

sudo systemctl enable --now apache2

We’re not accessing this externally, so no need for any firewall stuff.

Step 2: Install MySQL database server

sudo apt install mysql-server

The installation output tells us that the mysqld will log errors to /var/log/mysql/error.log.

Check the server is running with:

sudo mysql

This will connect to the MySQL server as the administrative database user root, which is inferred by the use of sudo when running this command. To exit the MySQL console, type ‘exit’.

Step 3: Install PHP

sudo apt install php libapache2-mod-php php-mysql

Step 4: Create databases

Logon to the mysql server:

sudo mysql

Then:

CREATE DATABASE databaseName1db;
CREATE DATABASE databaseName2db;

Now create the database users and passwords:

CREATE USER 'wp_user1'@'localhost' IDENTIFIED BY 'user1_password';
CREATE USER 'wp_user2'@'localhost' IDENTIFIED BY 'user2_password';

GRANT ALL PRIVILEGES ON databaseName1db.* TO 'wp_user1'@'localhost';
GRANT ALL PRIVILEGES ON databaseName2db.* TO 'wp_user2'@'localhost';

FLUSH PRIVILEGES;
exit;

Step 5: create Apache server blocks

Now create a server block for each website:

sudo nano /etc/apache2/sites-available/site1.com.conf
sudo nano /etc/apache2/sites-available/site2.com.conf

Here’s an example of the content of each .conf file:

<VirtualHost *:80>
  ServerAdmin admin@example.com
  DocumentRoot /var/www/example.com/
  ServerName example.com
  ServerAlias www.example.com

  <Directory /var/www/example.com/>
    Options Indexes FollowSymLinks MultiViews
    AllowOverride All
    Order allow,deny
    allow from all
  </Directory> 
  ErrorLog ${APACHE_LOG_DIR}/error.log
  CustomLog ${APACHE_LOG_DIR}/access.log combined
</VirtualHost>

Next, enable the server blocks:

sudo a2ensite site1.com.conf
sudo a2ensite site2.com.conf

Step 6: create document root folder for each site

sudo mkdir -p /var/www/site1.com
sudo mkdir -p /var/www/site2.com

When done, copy the latest WordPress into each folder.

Step 9: configure WordPress database settings

To create WordPress wp-config.php for each domain:

sudo cp /var/www/site1.com/wp-config-sample.php /var/www/site1.com/wp-config.php
sudo cp /var/www/site2.com/wp-config-sample.php /var/www/site2.com/wp-config.php

Then open each wp-config.php file and edit the database connection info.

Step 10: Permissions, etc

Modify the directory permissions:

sudo chown -R www-data:www-data /var/www/
sudo chmod -R 755 /var/www/

Check Apache settings, enable rewrite module and restart server:

sudo apachectl configtest
sudo a2enmod rewrite
sudo systemctl restart apache2.service

Step 11: set up local hosts file

We need to redirect requests to serve our locally hosted sites to the local Apache server, rather than have them go out to the external internet. This is done by adding two entries to the /etc/hosts file:

sudo nano /etc/hosts

Add a line for each of our local sites:

127.0.0.1       localhost
127.0.1.1       QPC-ATTIC
[XXX.XXX.XXX.XXX = IP address of local server]    local_site_1.com
[XXX.XXX.XXX.XXX = IP address of local server]    local_site_2.com